Email account setup in Outlook 2016
This tutorial will help you to configure Microsoft Outlook 2016 for an email account.
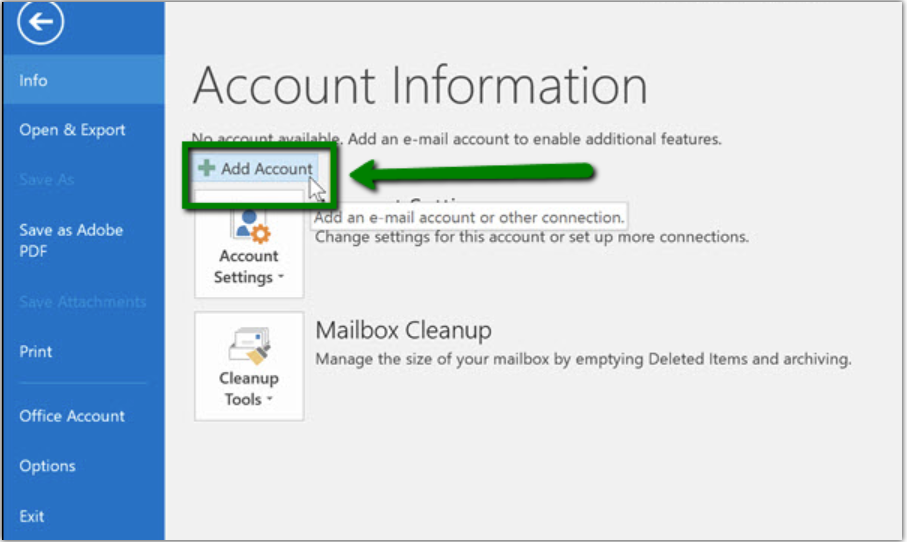
Step 1. Open Microsoft Outlook 2016 on your device. Click the +Add Account button. In case you have mailboxes set up before, go to the File tab >> Info >> Account Information page and click the +Add Account button.

Step 2. Select E-Mail Account and enter your information:
Your Name: The name of your account in Outlook
E-mail Address: Full email address (name@domain.com)
Password: Password for your email account
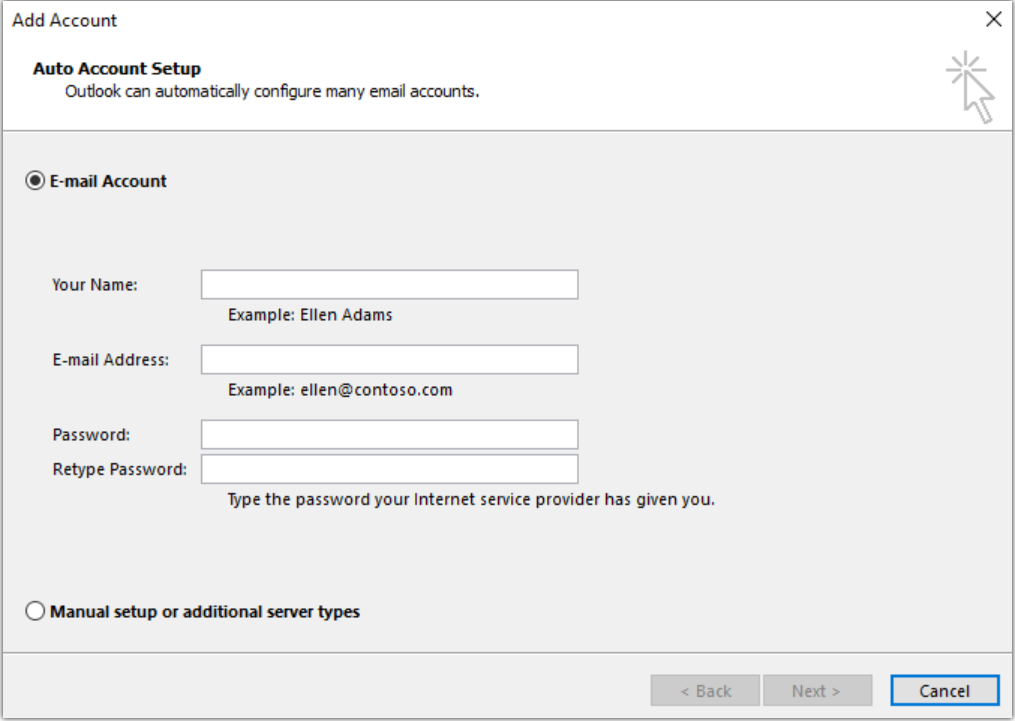
Click Next to proceed further. If you are not able to proceed, you may need to repeat the process using the manual setup. The detailed instructions can be found below.
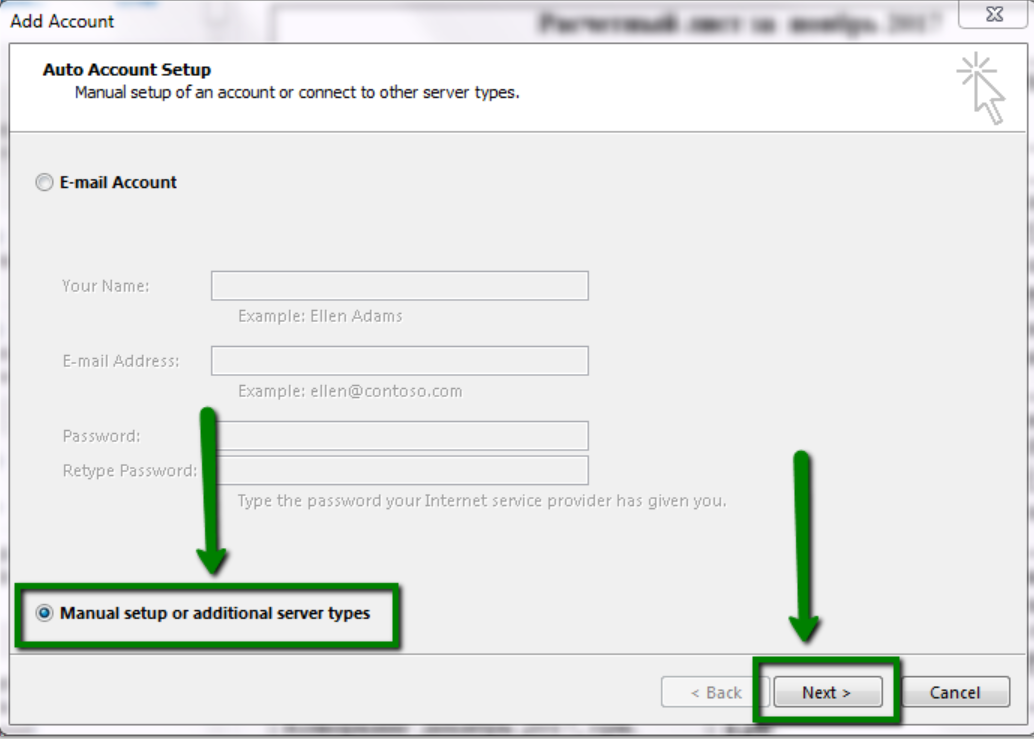
Step 3. Select the Manual setup or additional server types option and click Next
Step 4. On the next page, select the POP or IMAP option and then click Next
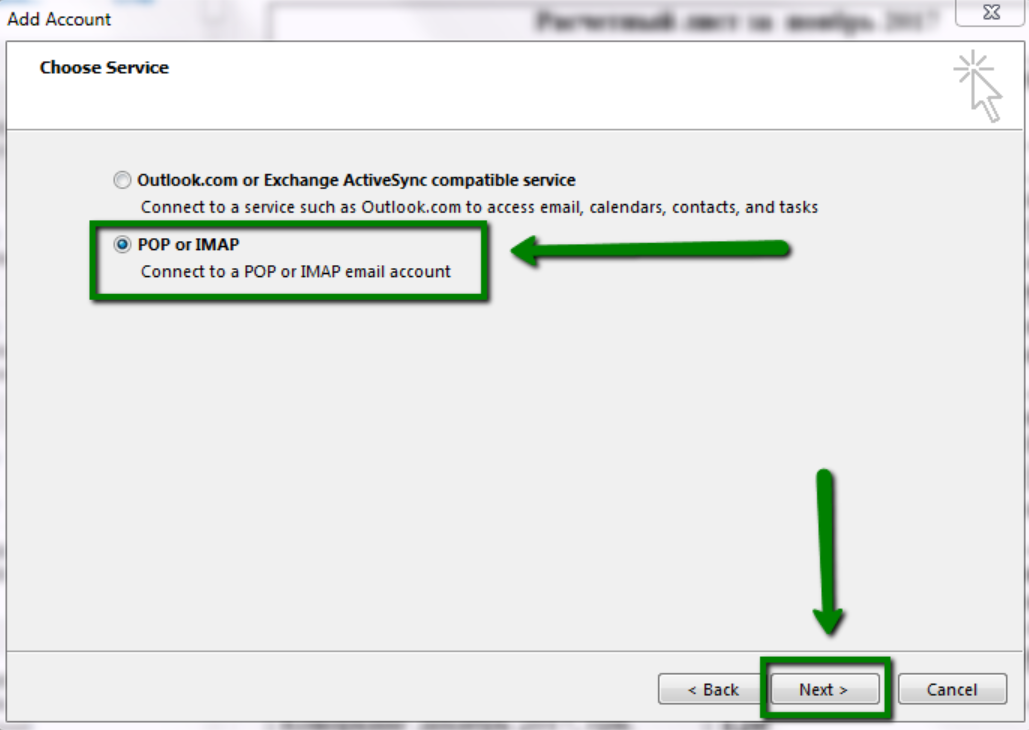
IMAP: The biggest advantage of using IMAP is you can access your mail from multiple mail clients and each client detects the change in real-time. Suppose mail server is connected with two different mail clients (let’s say Client 1 and Client 2) on different computers. If the user deletes a message in mail client 1, the change will appear on mail server immediately and also on mail client 2. In IMAP all messages from mail clients and servers are synced with each other.
POP: You can download emails from mail server to your PC using POP. After downloading, the original mail is removed from the server or you could keep the copy f those mails in server for required time period.
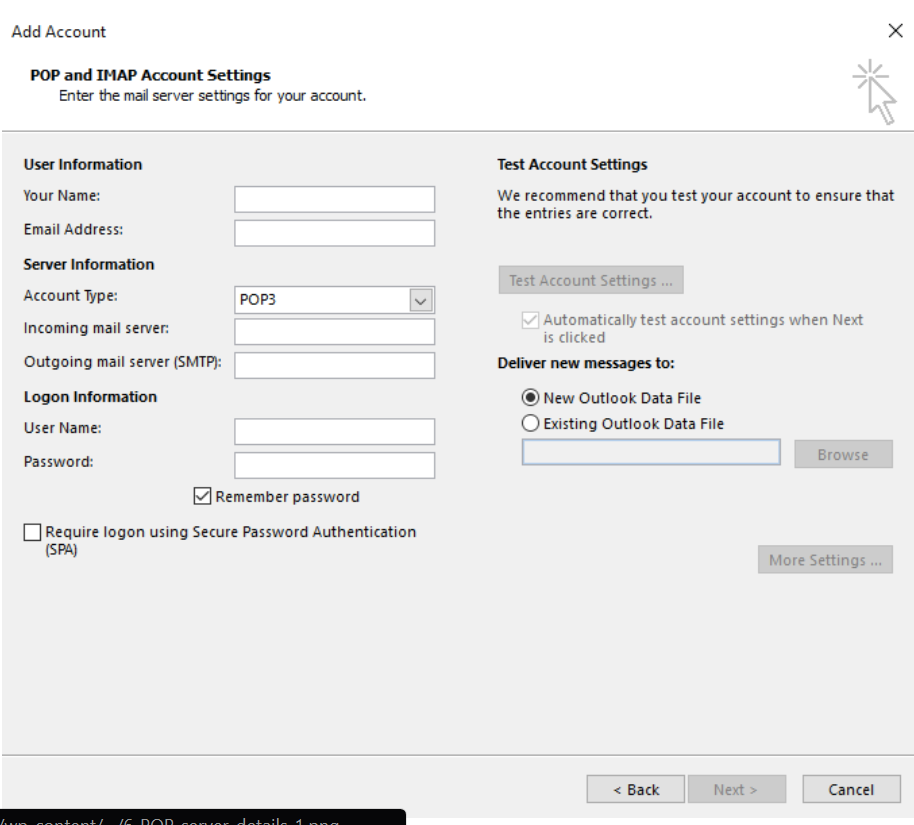
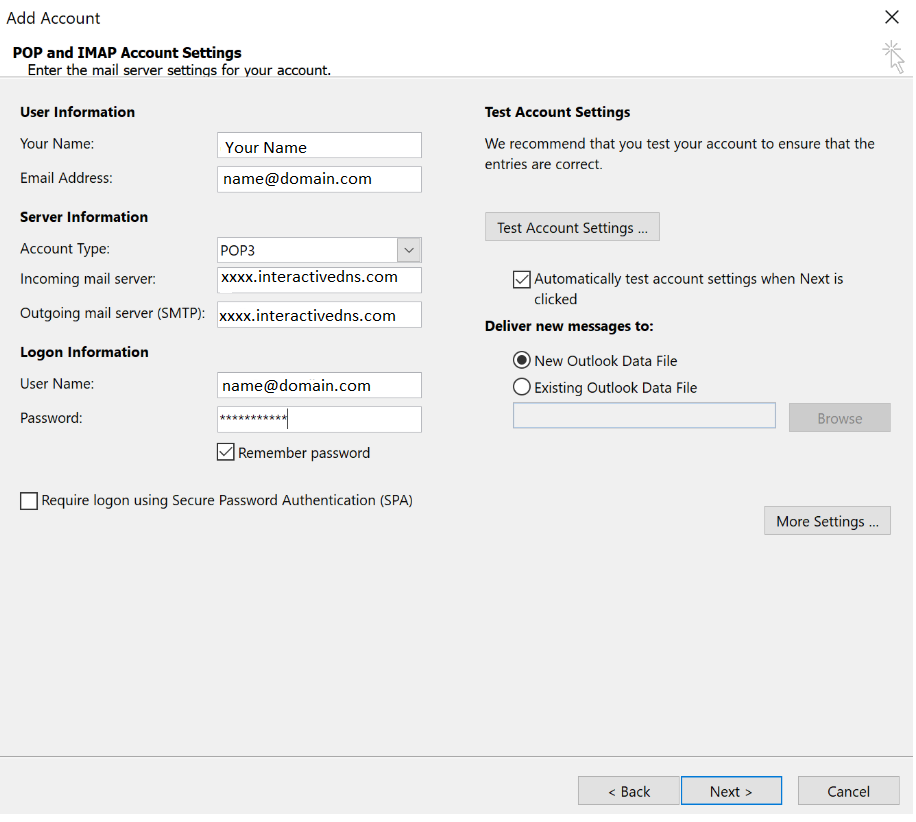
Step 5. Enter the following details:
Your Name: Enter the sender’s name you’d like to appear on your emails.
Email Address: Your full email address (name@domain.com).
Account Type: Use the dropdown menu to select POP3 or IMAP.
Incoming mail server: Server name where your account is hosted on (XXXX.interactivedns.com.com).
Outgoing mail server (SMTP): Server name where your account is hosted on (XXXX.interactivedns.com.com).
User Name: Your email account username (name@domain.com).
Password: Your email account password.
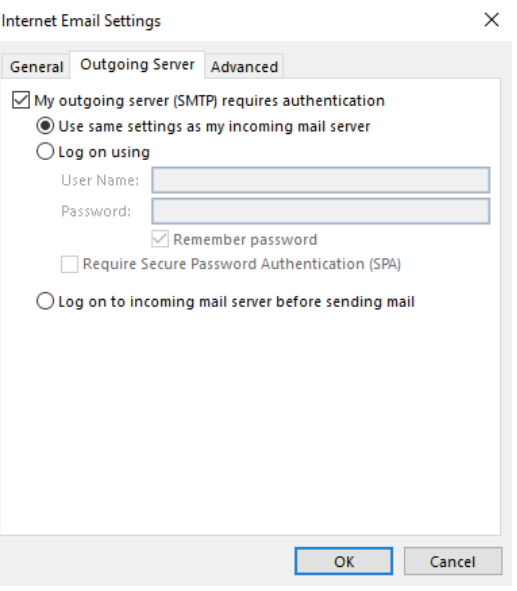
Step 6. Next, click More Settings… and go to the Outgoing Server tab. Select the option called My outgoing server (SMTP) requires authentication and select Use same settings as my incoming mail server.
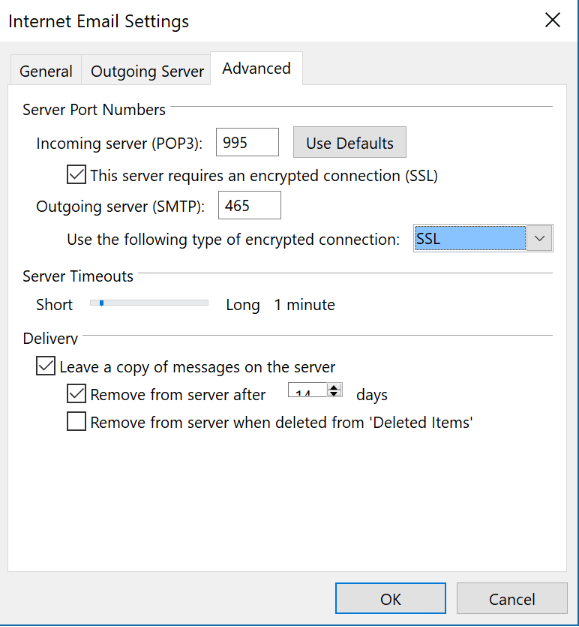
Step 7. Go to the Advanced tab and use the following ports and encryption based on the connection type you have chosen:
Incoming server (if are using IMAP): 993 port for SSL, 143 for TLS
Incoming server (if you are using POP3): 995 port for SSL, 110 for TLS
Outgoing server (SMTP): 465 port for SSL, 25/587 port for TLS
Click OK > Next
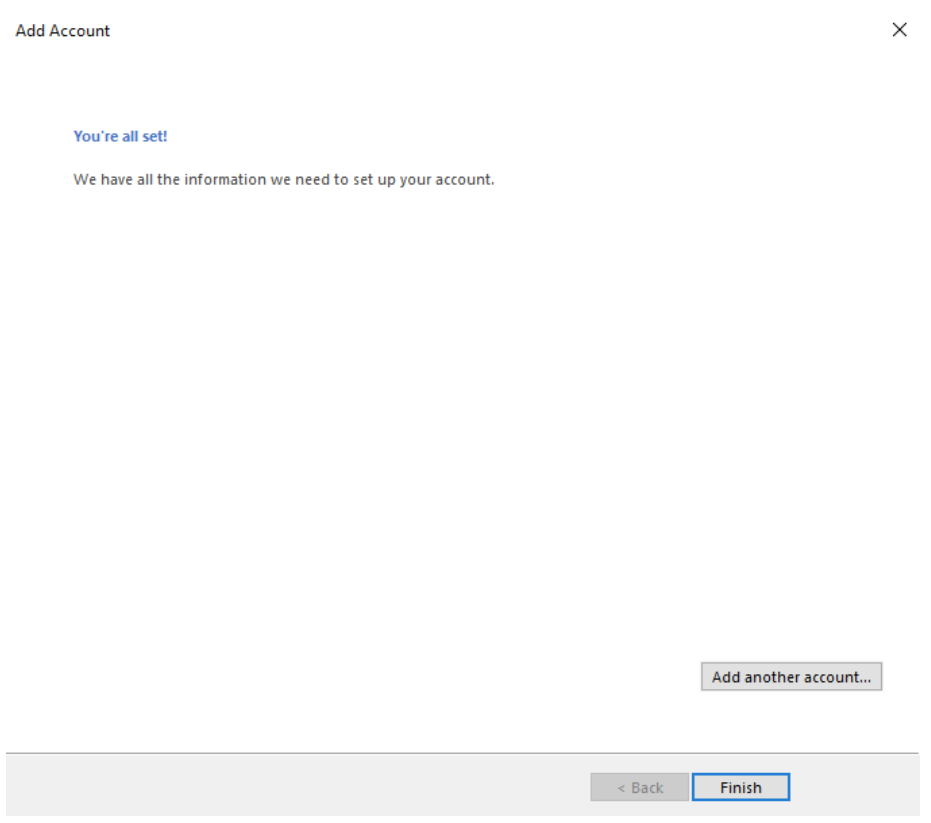
Step 8. If the test fails, retrace your steps, ensuring your server and account details have been entered correctly.
Once the test completes successfully, click Next and then Finish to wrap up.